LaneDiff costs me $50/month to run. If it helped you win a lane, a small tip keeps it alive. 💙
$0 / $50 raised this month
Teemo vs Warwick
Top Lane MatchupTeemo vs Warwick TOP matchup tips: who wins, how to trade, wave control and common mistakes.

You
VS
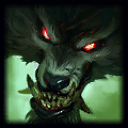
Tap any portrait to switch perspective
Who Wins
- Pre-6, you win this lane clearly at every level — your range lets you poke freely, your E poison stacks deny Warwick's passive healing efficiency, and your Q blind completely shuts down his auto-attack-reliant damage pattern.
- Post-6, the matchup becomes genuinely dangerous: Warwick's R is a point-and-click suppression that ignores your Q if he activates it before you can react, and his W passive healing on a poisoned target means he sustains through fights better than you expect.
How to Trade
- Your optimal trade pattern is to auto-E poke from max range repeatedly to keep Warwick's HP low enough that his W passive fear aura activates, then disengage rather than fighting into it — a feared Warwick still has R available, and fighting a low-HP Warwick at close range is exactly where he wants you.
- Use Q proactively when Warwick walks toward you aggressively, not reactively after he has already closed distance, because the blind needs to land before his auto-attack sequence begins.
Wave Control
- Keep the wave slightly pushed toward Warwick's tower early — this shortens his path to jungle assistance and forces him to farm under tower, but more importantly it maximizes the distance he must cross to reach you, giving you more time to poke and Q before he closes in.
- Avoid freezing the wave deep in your side of the lane, as this gives Warwick a short engage path and reduces your escape room if he uses R.
Mistakes to Avoid
- Do not stand still to auto-attack Warwick when he is below 50% HP — his W passive activates a fear aura that makes nearby enemies flee, and if you are in melee range farming or trading, you will be feared directly into him rather than away, setting up a free R.
- Always maintain max range and kite backward when his HP drops low.
Created on 07/11/2026
🛠️ Something wrong?