LaneDiff costs me $50/month to run. If it helped you win a lane, a small tip keeps it alive. 💙
$0 / $50 raised this month
Locke vs Orianna
Mid Lane MatchupLocke vs Orianna MID matchup tips: who wins, how to trade, wave control and common mistakes.
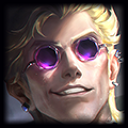
You
VS
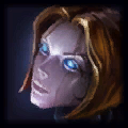
Tap any portrait to switch perspective
Who Wins
- Pre-6 you lose the poke war against Orianna's range — she can freely Q the Ball onto you and reposition it to deny your E approach, so avoid extended trades and instead look for short all-ins only when you have three Q stacks ready.
- Post-6 the matchup flips in your favor because R's execution threshold combined with W's heal gives you both kill pressure and survivability that Orianna cannot match in a committed fight.
How to Trade
- Your best trading pattern is to land Q stacks at range first, then E in, immediately activate W for the attack speed steroid, auto-attack to consume stacks with E's dash follow-through, and recast W to heal before Orianna's Ball can land a Command: Shockwave on you.
- Patience is critical — do not E in without at least two Q stacks on Orianna, because without the bonus damage from stack consumption your burst falls short of killing through her shield.
Wave Control
- Play for short trades early and avoid pushing the wave aggressively, since Orianna outpushes you and will use wave priority to roam or force you to farm under tower where her Ball poke is even safer.
- Once you hit level 6, look to freeze near your side of the lane to bait Orianna into overextending for CS, then use R to slow and mark her before committing the E-W all-in for the kill.
Mistakes to Avoid
- Do not activate W carelessly as an escape tool — the true damage it deals to you during its duration means popping it while already low can finish you before you get to recast and heal, especially if Orianna has her Ball positioned to follow up.
- Avoid using E to engage without a clear path out, because Orianna's R is a point-and-click knockup that will interrupt your W recast window and leave you taking true damage with no heal.
Created on 07/08/2026
🛠️ Something wrong?