LaneDiff costs me $50/month to run. If it helped you win a lane, a small tip keeps it alive. 💙
$0 / $50 raised this month
Gangplank vs Tryndamere
Top Lane MatchupGangplank vs Tryndamere TOP matchup tips: who wins, how to trade, wave control and common mistakes.

You
VS
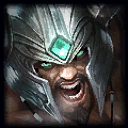
Tap any portrait to switch perspective
Who Wins
- Pre-6, you have a meaningful range advantage with Q and can poke Tryndamere down before he can engage, but if he reaches you at level 3 with full Fury and E, he will win the extended trade decisively — keep trades short and never let him stick to you.
- Post-6, your R gives you a safety net against his R, but his R still lets him survive your burst window and kill you if you've been weakened, so you cannot simply ult to escape a losing fight you initiated.
How to Trade
- Your optimal trade pattern is Q harass from max range to chip his HP and deny his passive healing stacks, then use W to cleanse his E slow if he tries to all-in, keeping the trade short and retreating before his Fury empowers his autos significantly.
- Never commit to a melee trade — your damage in close range does not outpace his attack speed and critical strike scaling once he has Fury built up.
Wave Control
- Push the wave consistently to deny him the passive healing he gets from farming under pressure, and use barrel combos to shove efficiently so he is forced to last-hit under tower where his all-in threat is reduced.
- Avoid letting the wave sit in the middle of the lane, as that is where he has the easiest access to all-in you with E into extended auto trading.
Mistakes to Avoid
- Do not use W reactively to cleanse his E slow after he has already closed the gap and started auto-attacking — by then his Fury is active and you are already losing the trade.
- W must be used proactively or immediately on E application before he layers autos on top of it.
Created on 07/31/2026
🛠️ Something wrong?